
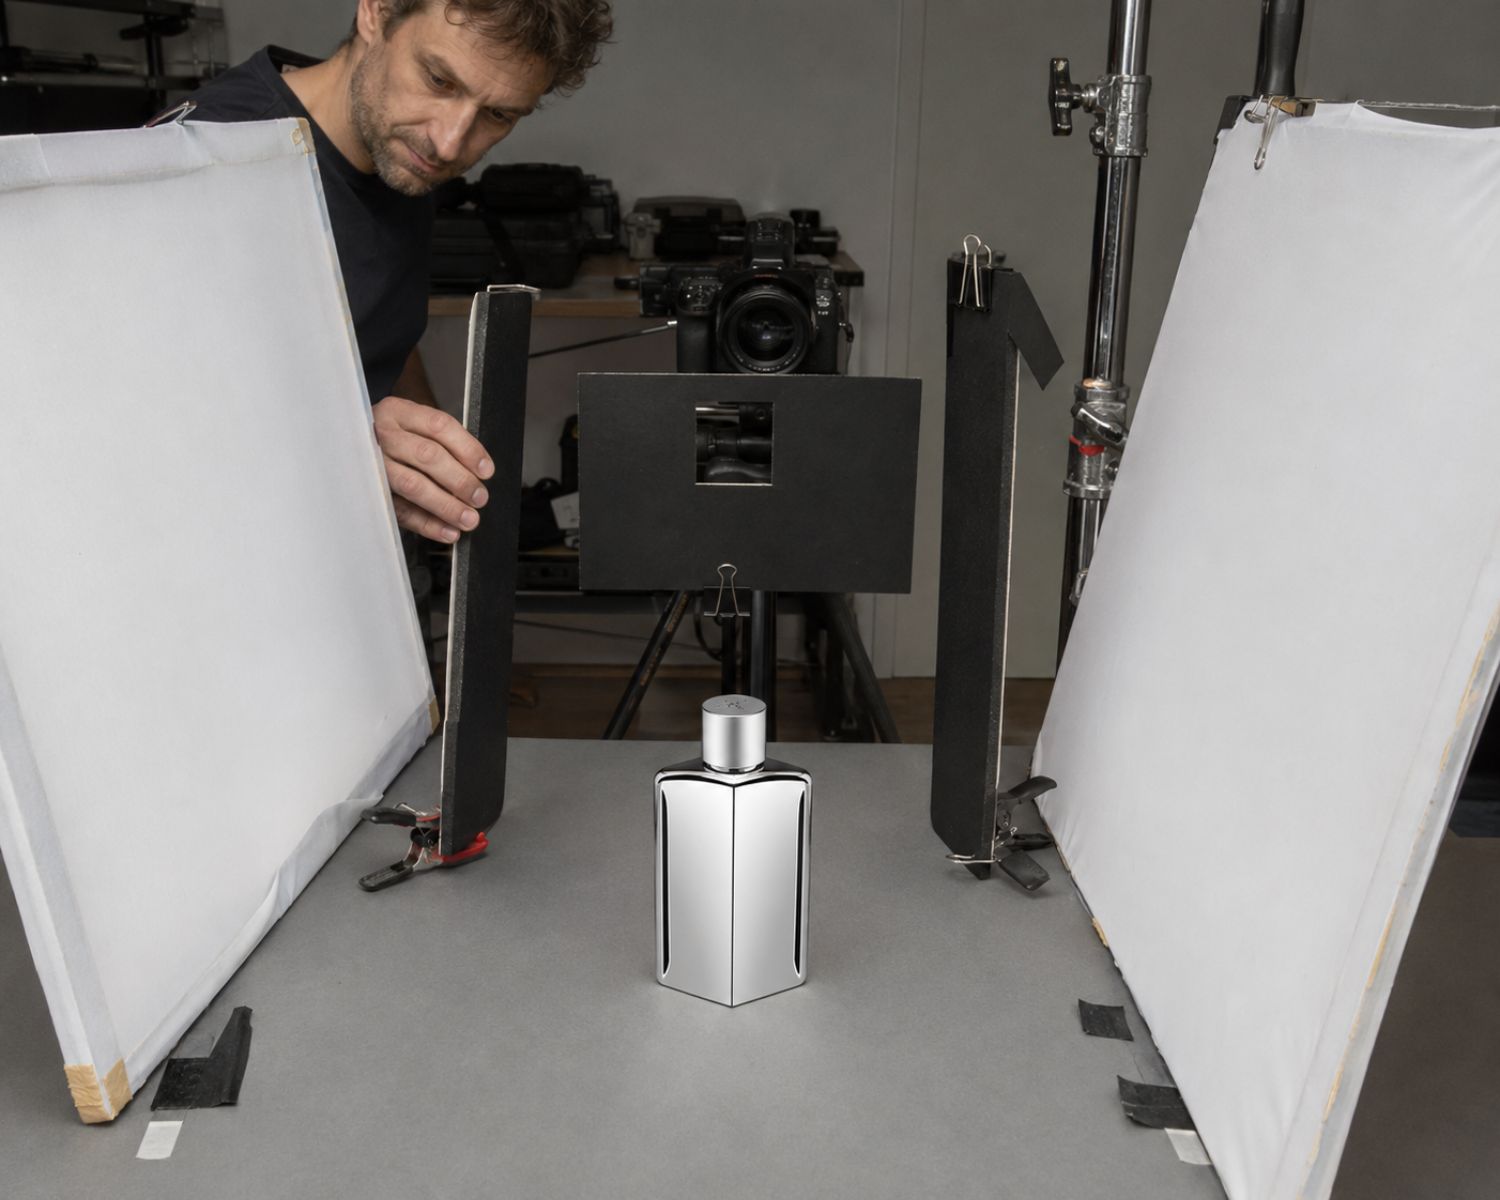
Shiny products can turn a simple photoshoot into a puzzle. Glass, metal, jewellery and glossy packaging reflect the lights, camera, room and photographer.
Removing every reflection can make an object look flat. The goal is to control the surface so reflections describe its shape without revealing the set.
With careful positioning and larger light sources, photographers can create clean images without relying on heavy retouching.
Study What the Object Reflects
A reflective object behaves like a curved mirror. Moving a light or changing the camera angle can dramatically alter what appears.
Look at the object from the camera position. Identify windows, walls, clothing, tripod legs and furniture in its surface. Clearing the area often solves more than adding another light.
Make the Light Source Larger
A small bare light creates a sharp hotspot. A large diffused source produces a smooth highlight that defines the object’s form.
Place a softbox, diffusion panel or translucent fabric between the light and the subject. The shiny surface will reflect the diffuser rather than the exposed bulb.
Photographers studying commercial images on Lovely Lens can observe how controlled highlights reveal edges and curves. Reflection is often part of the lighting design rather than a flaw.
Build a Simple Light Tent
Small products can be surrounded with white diffusion material, leaving only an opening for the lens. This creates clean reflections from several directions and hides much of the room.
A light tent is convenient, but white foam boards and diffusion sheets can produce a similar effect. Keep materials away from hot lights and avoid colour casts.
For dark or chrome objects, add narrow black cards outside the tent. Their reflected lines can separate edges that would otherwise disappear against a white background.
Change the Camera Angle
The photographer appears when light reflects directly from that position into the lens. Moving the camera higher, lower or sideways can redirect it.
Use a tripod for controlled adjustments. A longer focal length can position the camera farther away, making its reflection easier to conceal.
If the product must be photographed straight on, place a black card in front of the camera and cut a small opening for the lens. The object will reflect one clean shape instead of the photographer and equipment.
Use Polarisation Carefully
A circular polarising filter can reduce glare from glass and many painted or plastic surfaces. Rotate it while watching the effect through the viewfinder.
Polarisation is less effective on reflections from bare metal. It can also remove highlights that give an object dimension, so use it to reduce distracting glare rather than automatically eliminating every reflection.
For greater control, place polarising material over the lights and a polariser on the lens. This can suppress stubborn reflections but reduces available light.
Clean and Review the Product
Shiny surfaces reveal fingerprints, dust and scratches immediately. Wear clean gloves, polish the object before positioning it and use an air blower for loose particles.
Review test images at full size because small unwanted reflections may not be visible on the camera screen. Correct the angle or surrounding cards before continuing.
Shape Reflections Instead of Fighting Them
Successful reflective-product photography is mostly environmental control. Large diffusers, carefully placed cards and small camera movements determine what the surface shows.
Once you treat the object as a mirror, the process becomes more predictable. Instead of removing all highlights, create simple reflections that define the product while keeping the photographer out of view.
#ProductPhotography #ReflectiveObjects #PhotographyLighting #StudioPhotography #PhotographyTips #CommercialPhotography #CreativeLighting #MyLovelyLens
